Read More »
The post Cheap & fun chocolate-free Easter basket for children appeared first on One Busy WAHM.
]]>
My children both love chocolate (they take after me, for sure!) but they get so much at Easter-time, and I was hesitant to add to the overload.
1) Because there is a real danger I may accidentally land face-first into their chocolate eggs after they have gone to bed, and 2) it leads to a very stressful few weeks of saying, “No, you cannot have chocolate for breakfast,” “No, you cannot have another egg today, ” “No you cannot skip dinner because you have filled up on chocolate.”
Thomas is pretty sharp and quickly asked for cash instead of an Easter gift. Lauren, on the other hand.. at 5, she is still my baby girl and loves all things pink and pretty and asked for an Easter basket. Now, Easter baskets can get expensive pretty quickly, so I hunted around for some fun Easter basket fillers that didn’t cost the earth.
Lo-Cost Easter Basket Fillers
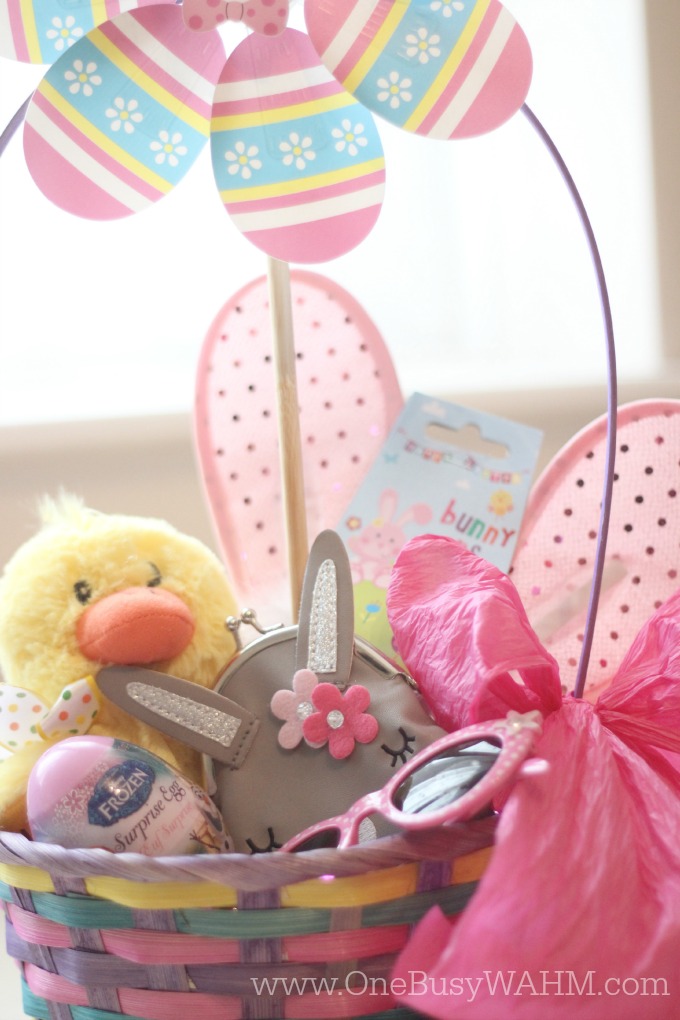
Basket, £1 – Poundland // Fluffy chick, £1 – Poundland // Bunny ears, £1 – Poundland // Frozen surprise egg, 3 for £1 – Poundland // Bunny purse, £2 – Primark //
Pink sunglasses, £1 – Primark // Windmill, £0.99 – 99p Stores
(The pink shredded tissue and crepe ribbon bow I already had at home in my box of party supplies).
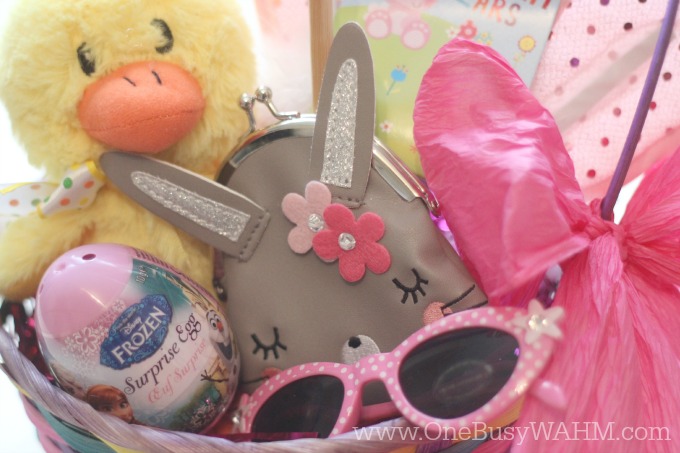
I am really pleased with how it turned out and I just know she will love it!
The Easter Bunny *may* have gotten them a little gold Lindt bunny, too. But one nibble, and they are gone!
Do you give Easter gifts in your house? Tell me, are you a chocolate traditionalist, or do you give other Easter gifts, too?

The post Cheap & fun chocolate-free Easter basket for children appeared first on One Busy WAHM.
]]>Read More »
The post Halloween Craft: Make Paper Pumpkins appeared first on One Busy WAHM.
]]>
As a child growing up, Halloween was always a low-key affair. We maybe got a fun plastic face mask and if we asked nicely (pleaded!) mum would take us to a few neighbours homes for trick or treat. But back then, Halloween wasn’t really a ‘thing’.
Nowadays, there’s a noticeable shift in trends. Stores are filled with Halloween costumes, decor and treats and whilst we may not be in the league of celebrations in the USA, it’s so much more fun!
I also hope that all the fun we have dressing up and making Halloween crafts will create some wonderful memories and traditions that our children will remember for many years to come.
How To Make Paper Pumpkins
These paper pumpkins are perfect for little fingers. My 7 year old can confidently use the paper trimmer (with supervision), but you may need to help with the cutting for younger children.
We’ve left these paper pumpkins empty, but they’d be great also filled with sweets or spooky treats for a perfect party favour or table place setting. Just write a name on the leaf!
You will need:
- Sheets of A4 paper or light card in Halloween colours (black, orange, gold etc)
- Paper trimmer, craft knife or scissors
- Small amount of green scrap card for leaves
- Green or brown pipe cleaners
- Sellotape
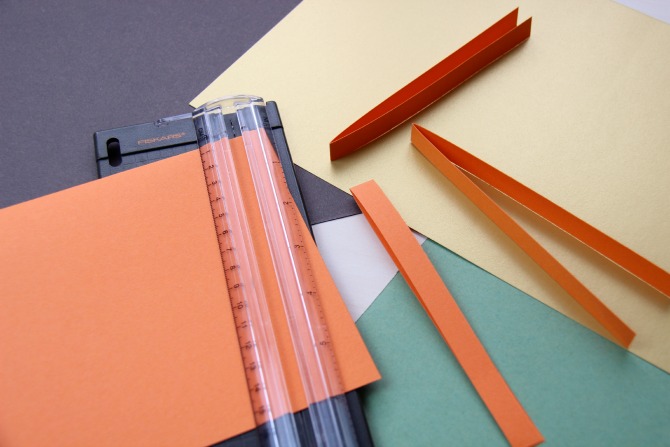
Fold your sheet of paper or light card in half width ways and trim into 1.5cm strips.
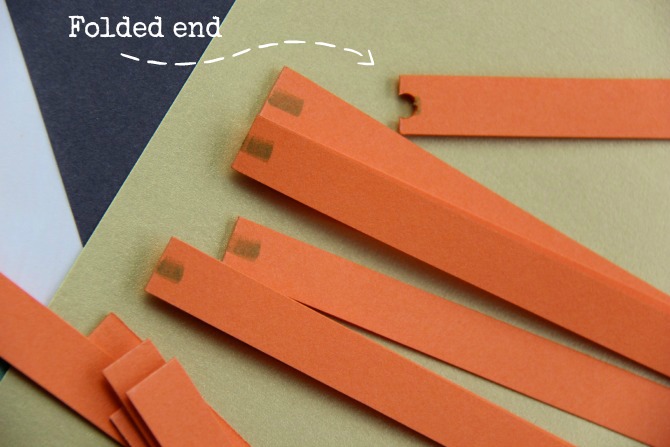
Using a hole punch, punch a hole on the edge of the fold.
(Be sure it’s on the edge so that when you open the fold you have one large hole and not two separate holes).
Pumpkin Tip: it can be tricky to see exactly where you are punching the hole, miss the centre and make a hole in the edge. Grab a marker pen and swipe some ink in the centre of your fold. Remove the back from your hole punch (have fun with all those paper sprinkles!) and expose the cutting area. Holding the punch upside down you can now insert your paper and easily see where to line up.
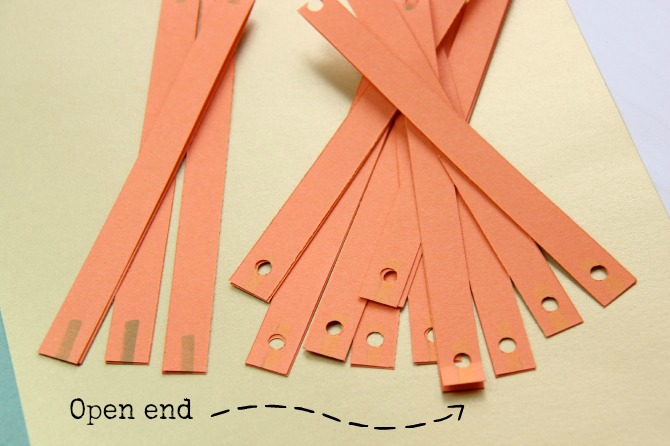
When you have finished punching your folded ends, turn your paper strip round and punch a hole in the open ends.
This time insert your paper all the way to the guide-edge in your punch, so the hole is created a short way down the strip.
Pumpkin Tip: Once again I used a marker pen to highlight the centre area. I used a marker pen with a magic eraser end so I could mostly hide any marks left behind 
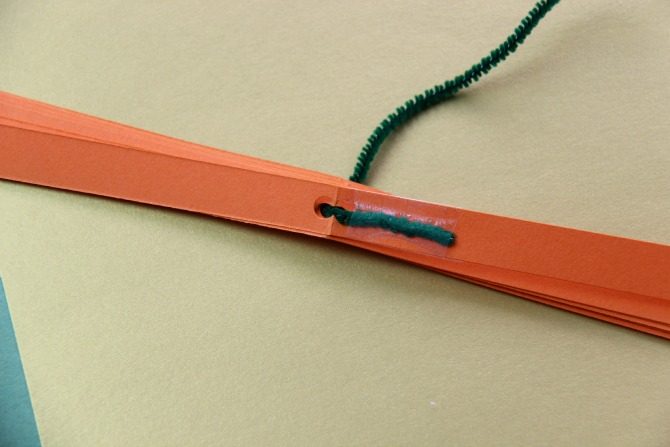
Gather all your strips together, insert a pipe cleaner through the centre hole and use a little Sellotape to secure on the outer strip only.
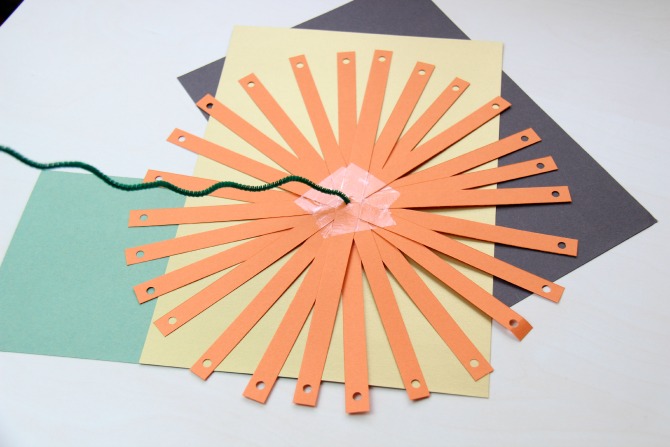
Fan out your paper strips, and aim for an even(ish) spacing all around.
Secure in place with a little Sellotape.

Take one strip and begin by threading the end hole over the pipe cleaner.
Continue all the way round in a clockwise direction.
Pumpkin Tip: Why not fill your pumpkin with sweet treats or spooky critters – these would make an awesome party favour or table place setting!
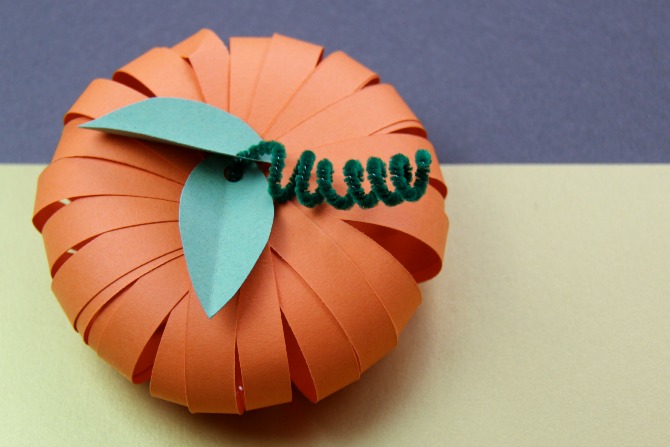
Cut two leaves from a scrap of green card, fold down the centre to create a leaf vein and punch a hole in the end. Thread onto your pipe cleaner.
Twist the surplus end of your pipe cleaner around a pen or pencil and create a curly pumpkin stalk.
Simple!
We made pumpkins in black, dark brown, gold and orange. So pretty!

Love this? See also: sweet/candy-free crepe paper pumpkin craft!
Do you make any Halloween crafts? Share your fab ideas in the comments below!
xoxo Natalie
The post Halloween Craft: Make Paper Pumpkins appeared first on One Busy WAHM.
]]>The post How To Make An Elsa Dress (no sewing required!) appeared first on One Busy WAHM.
]]>
It seems every little girl’s dream right now is to own a dress just like Queen Elsa. But with official Frozen merchandise so sparse (and expensive!) I just knew I’d have to get creative and make an Elsa dress of our own.
Actually, it’s not that difficult to make an Elsa dress – and it’s really quite quick and fun!
Even your little one could drive you nuts help you.
To make an Elsa dress you will need:
1 x stretchy crochet top
1 x roll of turquoise tulle
Tape measure
Scissors
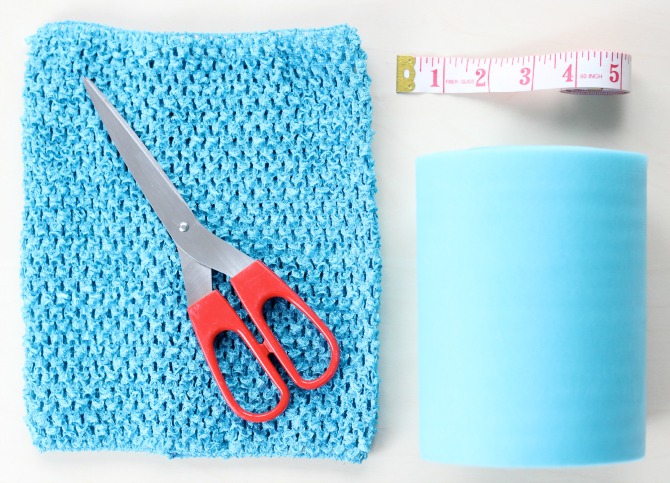
First, you need to decide how long you want your dress skirt to be. Using the tape measure, measure from your child’s waist downwards.
Remember this measurement and DOUBLE it. This will be the length you need to cut your pieces of tulle.
How To Make An Elsa Dress
Take your spool of tulle and cut-off a number of pieces that are equal in length to your (doubled) measurement.
It’s easier to prepare them in advance so start with 20-30 lengths and work from there.
You may also find it easier to stretch your crochet band over a book to expose the holes and make it easier to thread your skirt.
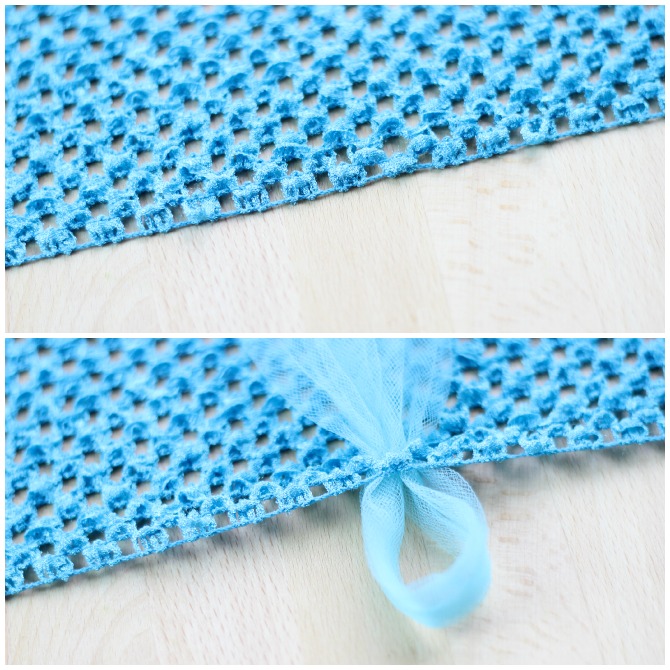
Take one piece of your cut tulle length, fold it in half and poke it through a hole on the lower edge of your crochet band.
I like to start threading on the 2nd row, as the first edge always looks so delicate!
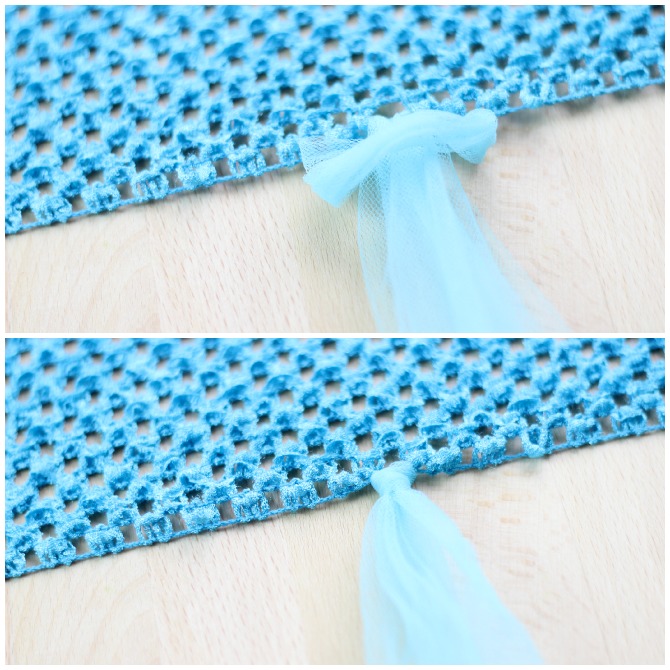
Holding the two loose ends of your folded length of tulle, poke them through the loop and gently pull to fasten.
Now the fun part… repeat all the way round 
Since Elsa’s dress is very fitting and elegant, I didn’t want the skirt of my Elsa dress to be overly ‘full’. I therefore chose to thread my tulle through every other hole in my crochet band.
And remember, this band is stretched open whilst I’m threading, so these will all condense down, too.

Once you’ve finished your first row, begin threading a second row for your Elsa dress.
This time, thread your tulle through alternate holes in the row above so you have no gaps in your skirt.

Decorate your Elsa Dress
I was hoping to find some gorgeous snow flakes that I could decorate our Elsa dress with, unfortunately, there was nothing to be found.
Instead, I found this gorgeous turquoise sequinned flower, which looks kinda like a snowflake, dontcha think?
In keeping with my no-sew project, I simply cut off a half-inch strip from my tulle roll and tied this on. Why make things more complicated than they need be!

The straps of our Elsa dress were super simple, too.
I took one of our left-over lengths of tulle from our skirt and made another slip knot at the front of the dress (at the top edge of the crochet band).
Taking one of the ends, I pulled it over the shoulder, pulling the fabric straight to form a small sleeve, then simply tied in a knot at the back to fasten.
You can trim any loose ends or just hide them inside.
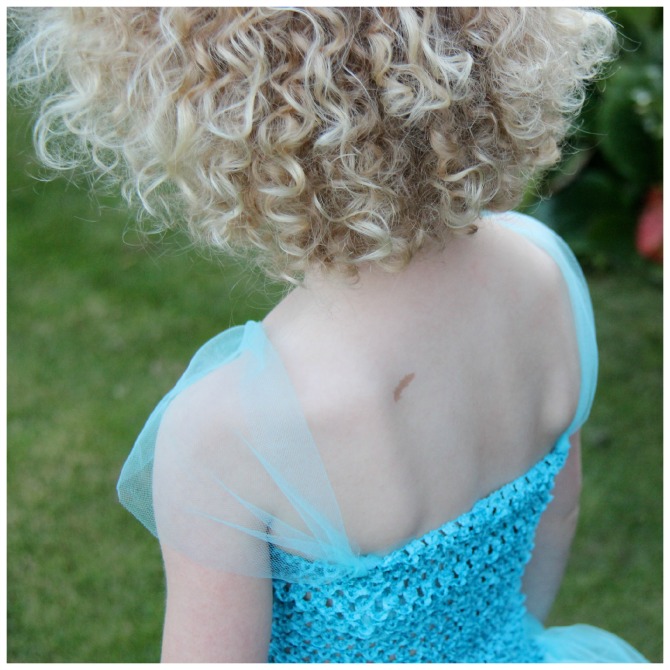
And that’s it.
How to make an Elsa dress!

You like?
Do you wanna build a snowman?
Sorry, I couldn’t resist
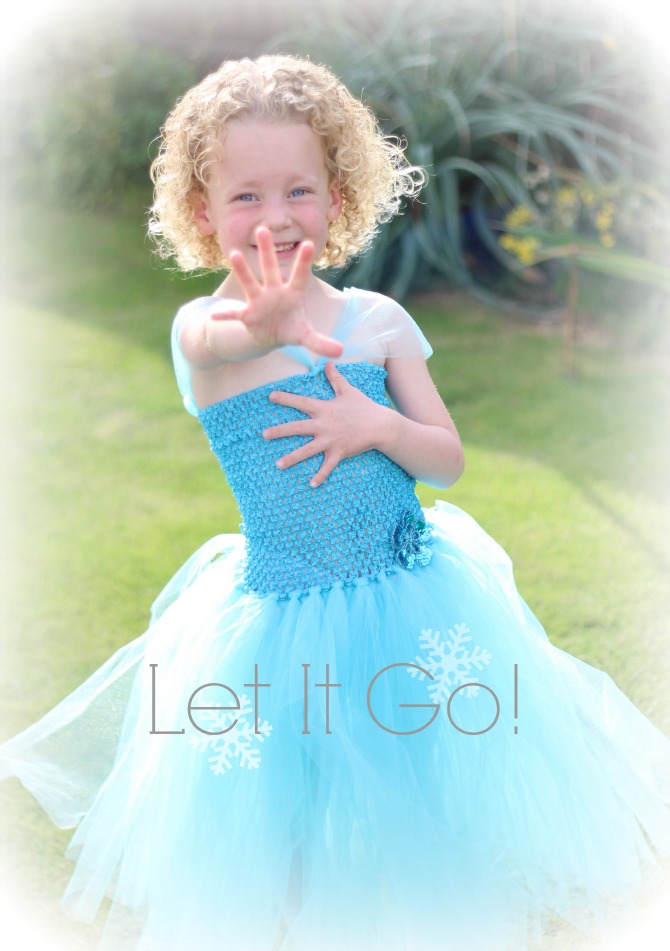
Your turn!
Why don’t you have a go and make an Elsa dress for your little Princess. It would make a perfect costume for Halloween!
If you do make one, I’d love to see it. Please pop back and share a photo or leave a post on my Facebook wall.
Got any questions? Leave me a message in the comments section below and I promise to respond to you.
xoxo Natalie
The post How To Make An Elsa Dress (no sewing required!) appeared first on One Busy WAHM.
]]>The post How To Make A No-Sew Christmas Tutu appeared first on One Busy WAHM.
]]>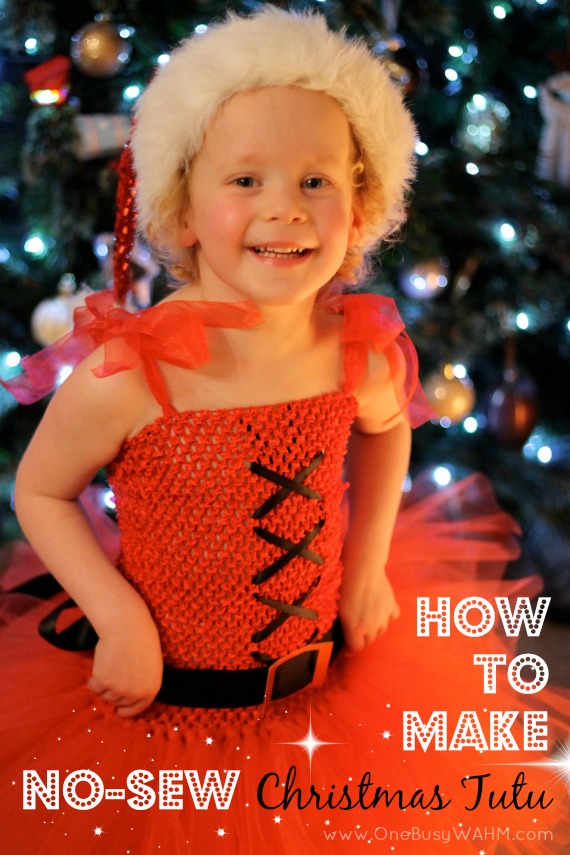
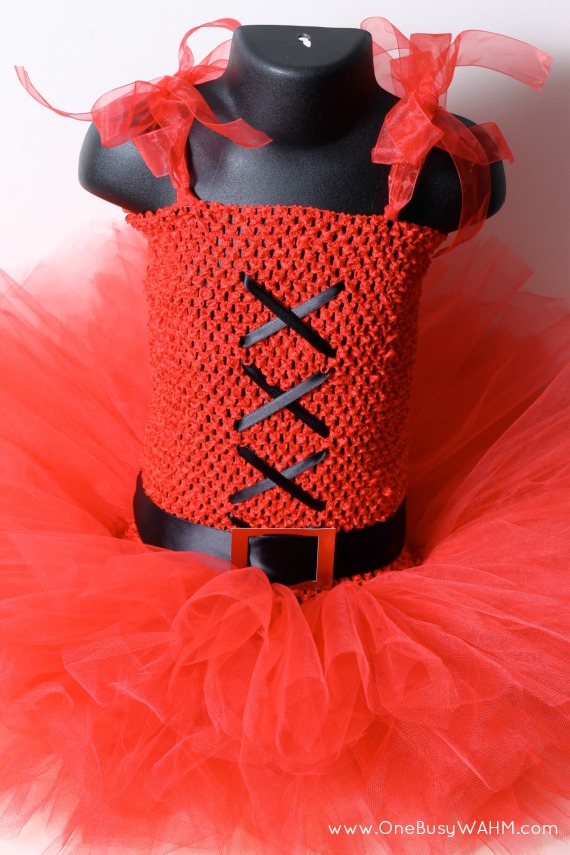
When Lauren asked me to make a Christmas tutu, I just couldn’t say no. If you would like to make a tutu of your own this Christmas, please feel welcome to follow these tips!
You will need:
- A stretchy, elastic crochet band for the body
- 2*** rolls of red tulle
- 3m Red organza ribbon
- 1m Narrow black ribbon for the lacing
- 1.5m Wide black ribbon for the belt
- Gold card to make the belt buckle
How To Make A No-Sew Tutu For Christmas
(*** To make this tutu, I purchased 2 rolls of 6″ wide soft red tulle (from eBay) and made my tutu skirt two layers thick. It used an entire roll per layer).
Decide on the length of your tutu skirt and cut off lengths from your tulle roll DOUBLE your required tutu skirt length. Lauren is 3.5 years old, and I made her skirt length 9 inches, ie. cutting my tulle in 18 inch lengths.
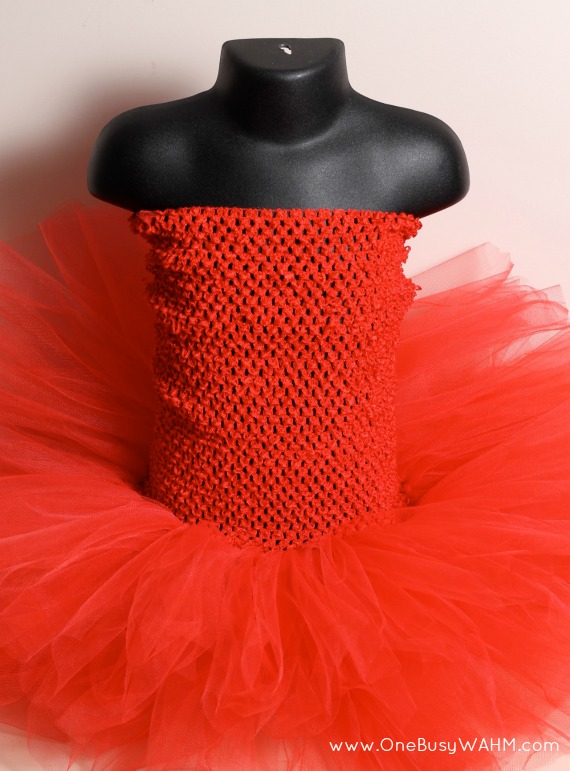
Fold your tulle pieces in half length-ways, thread the loop end through your tutu body and make a slip knot. Repeat evenly all the way round and in as many layers as desired. (I made my tutu with 2 layers and it was fabulously full).
Since I’ve previously shared a detailed step-by-step tutorial on how to make a no-sew tutu, I won’t repeat all the steps here – but please feel free to leave any questions in the comments box at the bottom of this post and I promise to reply to them all!
Tutu Straps
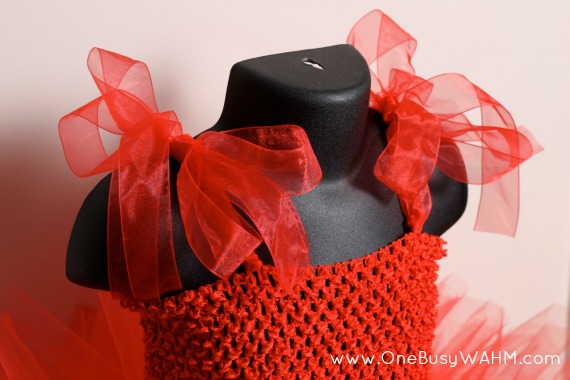
To make the tutu straps, I used a 3m length of ref organza ribbon, cut into 4 equal lengths.
Fold each piece of ribbon in half and make a slip knot (the same as for the tutu skirt) on the front and back of the shoulder areas, tying them in a pretty bow to fasten.
You can use any type of ribbon you prefer, but I like organza since it is soft on the skin and holds a lovely firm shape to the bow.
Tutu Belt and Lacing
Weave some narrow black ribbon through the crochet tutu band as ‘lacing’ and tie discretely in a knot on the inside to secure. Be sure to position this centrally between your shoulder straps 
To make the tutu belt, cut a rectangle out of a small piece of gold card and using a craft knife, cut two slits on either side to run the ribbon through. Tie the ribbon in a big bow at the back to secure.
Next step… have fun!

I hope these tips help you if you want to make a tutu this Christmas. Go ahead, it’s easy!
But if you’ve got any questions just leave me a comment in the box below and I’ll be sure to answer you!
~ Natalie
The post How To Make A No-Sew Christmas Tutu appeared first on One Busy WAHM.
]]>The post An Advent Calendar He Will Love This Christmas appeared first on One Busy WAHM.
]]>
I really struggle buying gifts for the men in my life. They are not the easiest of men to buy for.
I always try and make up for it with lots of little stocking fillers and gifts – but the thoughtful kind – that lets them know I was thinking of them.
Then I remembered THIS!
Beer Advent Calendar
I can’t recall when or where I first saw this idea, but I filed it in the back of my brain under “must do for Hubby one year”… and then I remembered it!
And it’s so simple to do!
All you need is:
- 1 case of 24 bottles of beer
- Christmas decorations of your choice
- Glue
- Ruler
- Sharpie marker
Simply divide up your box top into 24 even squares, number them in a random order and decorate.
I decided against cutting ‘windows’ for each day, since this would affect the overall strength of the box. Plus it kinda adds to the fun of digging-in each day 
Do you have a fun advent calendar? Tell me about yours!
~ Natalie
The post An Advent Calendar He Will Love This Christmas appeared first on One Busy WAHM.
]]>